How to Connect Houseware to Snowflake
Learn how to connect your Snowflake Central Data Warehouse to Houseware.
Overview
This guide is Part II of the How to Setup Houseware. If you have not completed the steps in Part I, we request you first complete them and then use this document to activate your Houseware instance with your product data.
This step-by-step guide will help you connect the transformed events (as per the Part I guide) and set up + connect a new Snowflake warehouse with the Houseware application. After completing the steps in this guide, you can view all selected product events on your Houseware instance to start analyzing and visualizing them.
Step-by-Step Guide
Follow the steps below to connect your prepared events schema with the Houseware application.
Step 1: Create a new Snowflake warehouse
Here is a code snippet that will help you create a new Snowflake warehouse for Houseware.
set warehouse_name='houseware_analytics_wh';
create warehouse if not exists identifier($warehouse_name)
WAREHOUSE_TYPE = 'STANDARD' WAREHOUSE_SIZE = 'MEDIUM' AUTO_SUSPEND = 60 INITIALLY_SUSPENDED = TRUE;
Important Info:The warehouse size can change based on your events volumes and workloads. The Houseware team will help you determine the right warehouse size.
How will a new warehouse help:
- Avoid disruption to existing queries: A new warehouse will make sure that Houseware queries do not impact or are impacted by any of your existing queries running on Snowflake.
- Easy to track cost: A separate warehouse will make it easier for your team to track costs due to Houseware's query compute.
- Easy to tune warehouse: To make the queries run on this warehouse faster and more cost-efficient, the Houseware team can continue to tune this warehouse without worrying about impacting your other queries running on Snowflake.
Step 2: Grant necessary permissions for the Houseware application
Grant necessary permissions to the Houseware application to connect with your events data - which has been transformed to a compatible schema and stored as allevents table in the new DB, as described in the Part I guide.
To grant necessary permissions to Houseware application, you will have to use a role that can create a new warehouse, role, and user. You can consider using Snowflake's ACCOUNTADMIN role for the same.
Follow the code snippet given below to create a separate role and grant specific permissions to that role
- Create a separate DB role:
set db_name='houseware_analytics_db';
set db_role= 'houseware_analytics_role';

create role if not exists identifier($db_role);
- Grant permissions to the role created above:
-- granting warehouse usage to db role
grant usage on warehouse identifier($warehouse_name) to role identifier($db_role);
grant operate on warehouse identifier($warehouse_name) to role identifier($db_role);
grant usage on database identifier($db_name) to role identifier($db_role);
grant create schema on database identifier($db_name) to role identifier($db_role);
grant usage on all schemas in database identifier($db_name) to role identifier($db_role);
grant usage on future schemas in database identifier($db_name) to role identifier($db_role);
grant create table on all schemas in database identifier($db_name) to role identifier($db_role);
grant create table on future schemas in database identifier($db_name) to role identifier($db_role);
grant select on all tables in database identifier($db_name) to role identifier($db_role);
grant select on future tables in database identifier($db_name) to role identifier($db_role);
grant select on all views in database identifier($db_name) to role identifier($db_role);
grant select on future views in database identifier($db_name) to role identifier($db_role);
- Create a Snowflake user with the relevant role:
set db_user= 'houseware_analytics_user';
set db_user_password='Abcdef12345';

-- creating Snowflake user with default role and warehouse
create user if not exists identifier($db_user);
set default_role = UPPER($db_role);
set default_warehouse = UPPER($warehouse_name);
alter user identifier($db_user) set password=$db_user_password default_role=$default_role default_warehouse=$default_warehouse;
- Grant the role created above to the DB user:
-- granting db role to db user
grant role identifier($db_role) to user identifier($db_user);
Note: Replace the default
db_role,db_name, anddb_user_passwordvalues with values that conform to your specific naming conventions for those resources.
Step 3: Log in to Houseware and choose Snowflake as your CDW
- Select Plug Houseware Option: You will see the page below on logging in for the first time (before setting up). Choose the "Plug Houseware to work on your Cloud data warehouse" option here.

First landing page, click on the "Connect warehouse" button
- Select Snowflake: Choose Snowflake as the data warehouse you want to connect to on the page shown below.
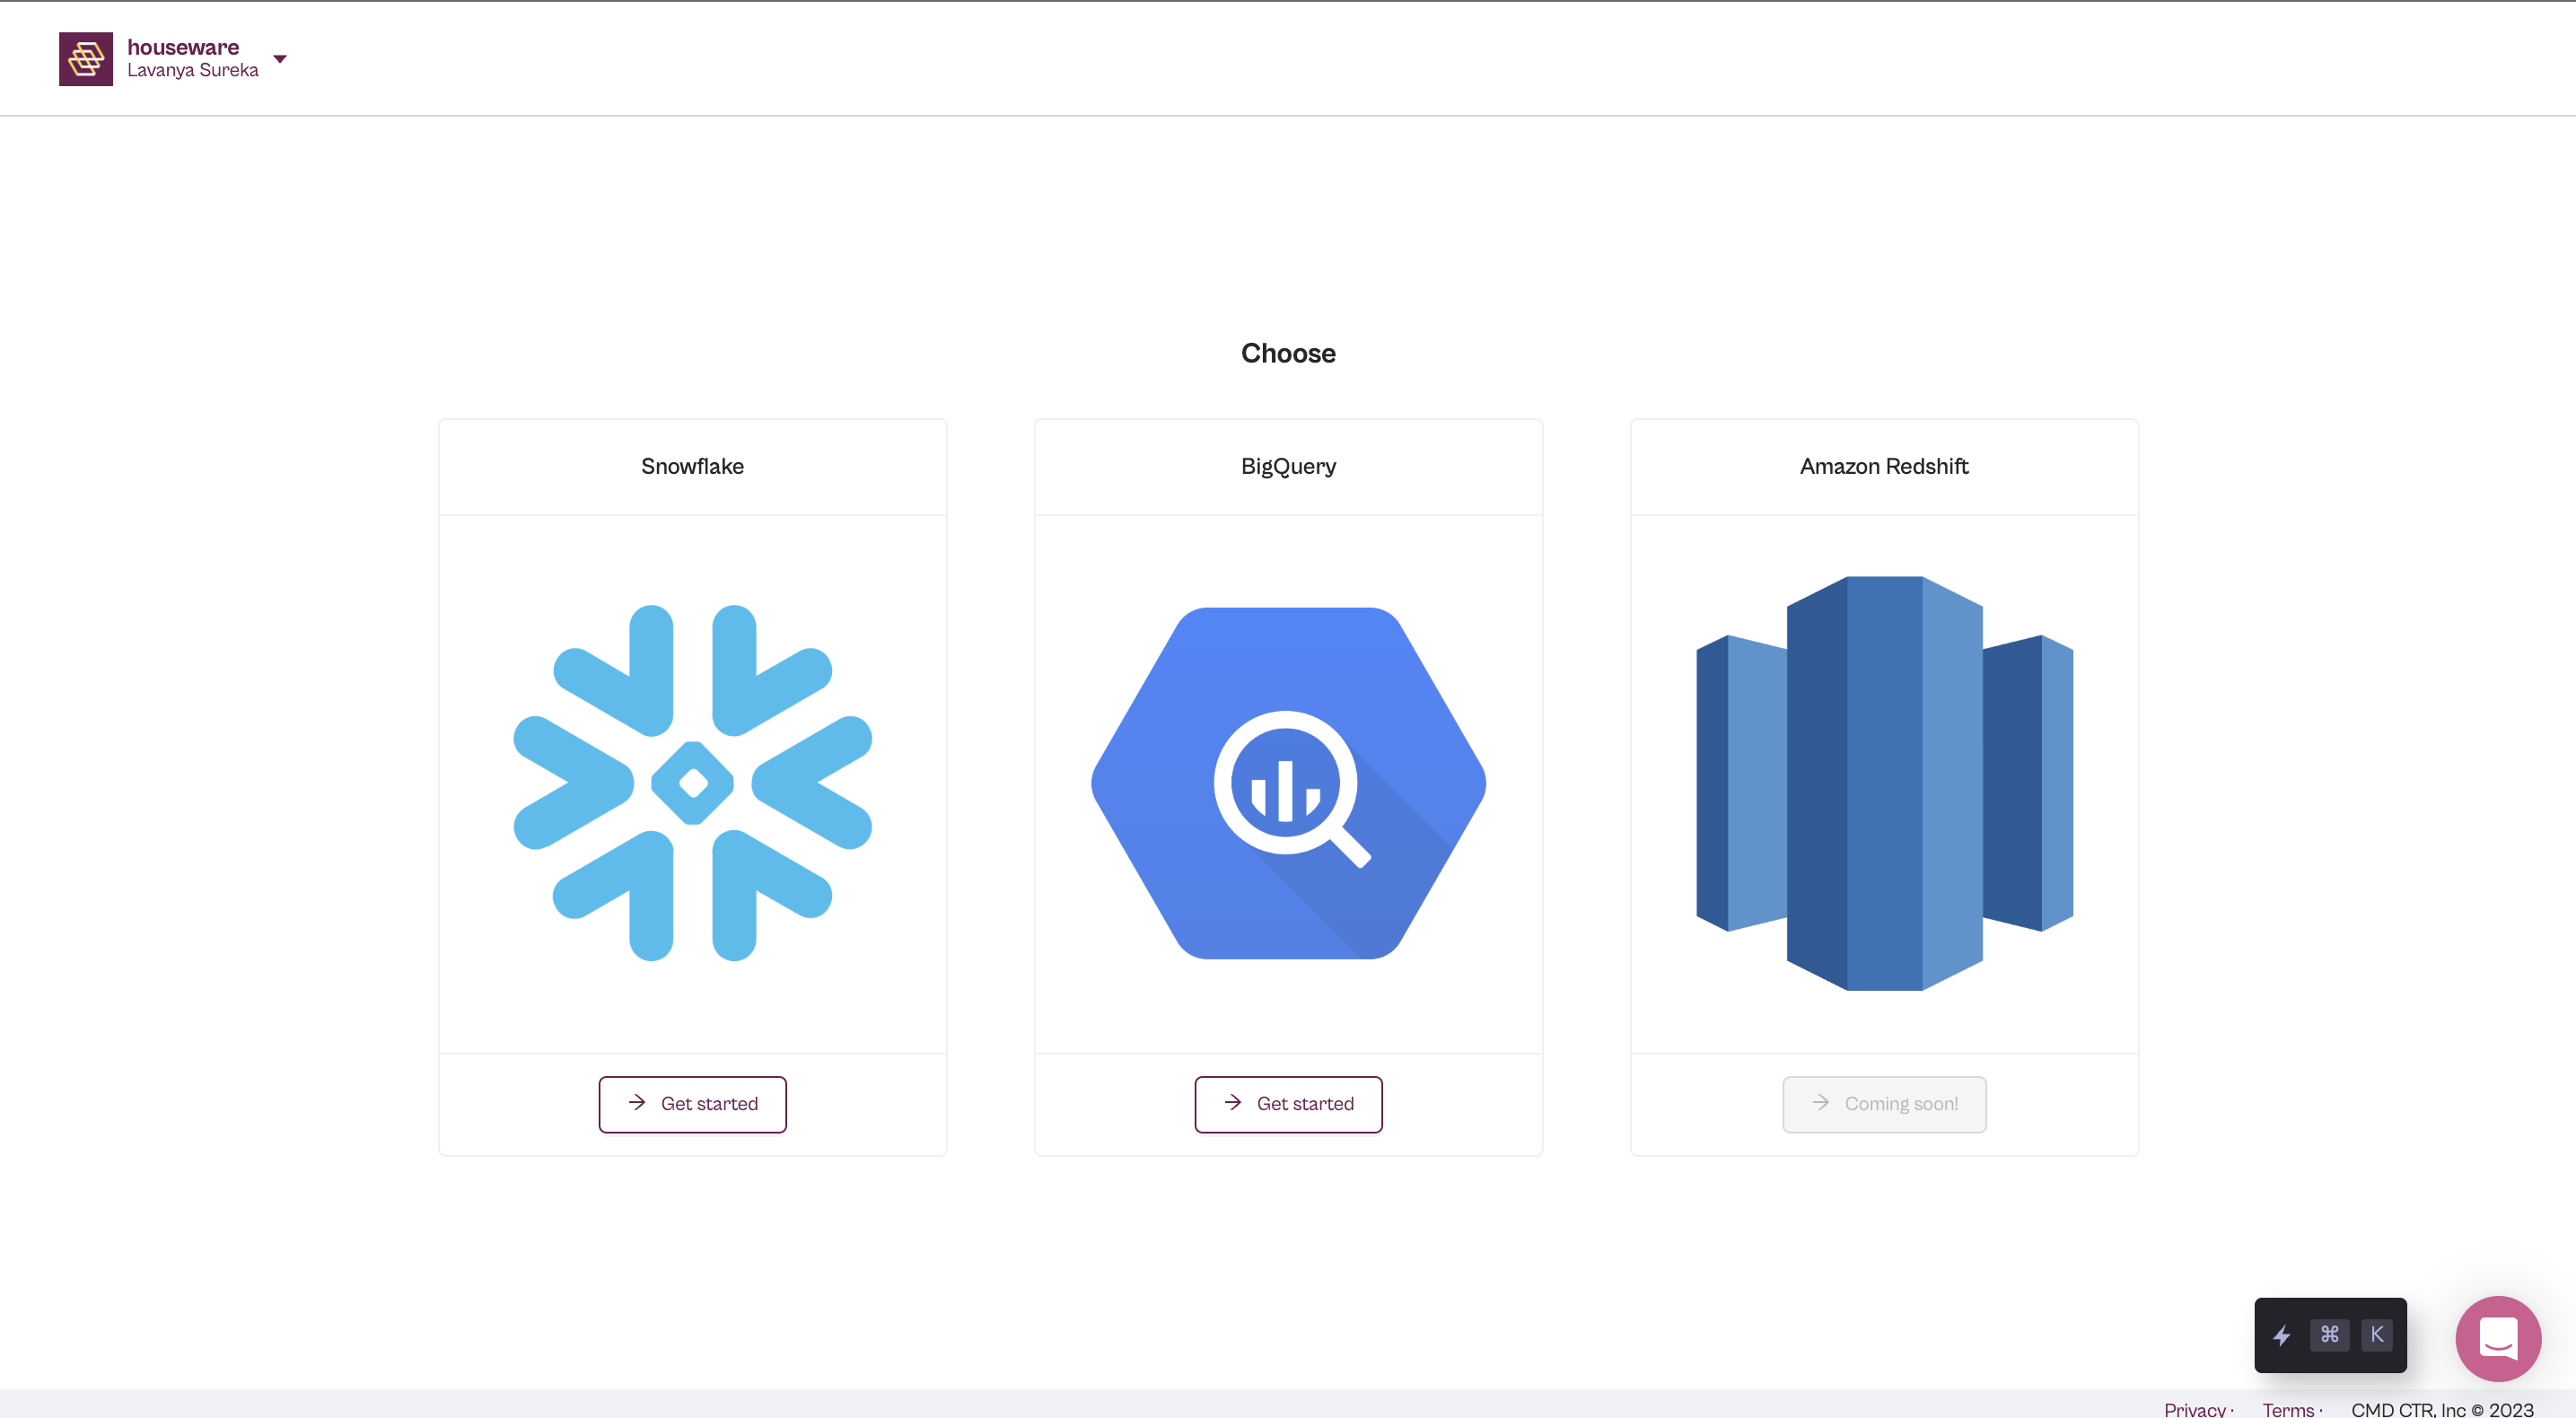
Choose your Cloud Data Warehouse
Step 4: Fill up the details at the bottom of the Connecting Snowflake page
Fill up the details used in the code snippets in step 2 along with some additional information in the form. This form is located at the bottom of the Connecting Snowflake page, as shown in the image below.
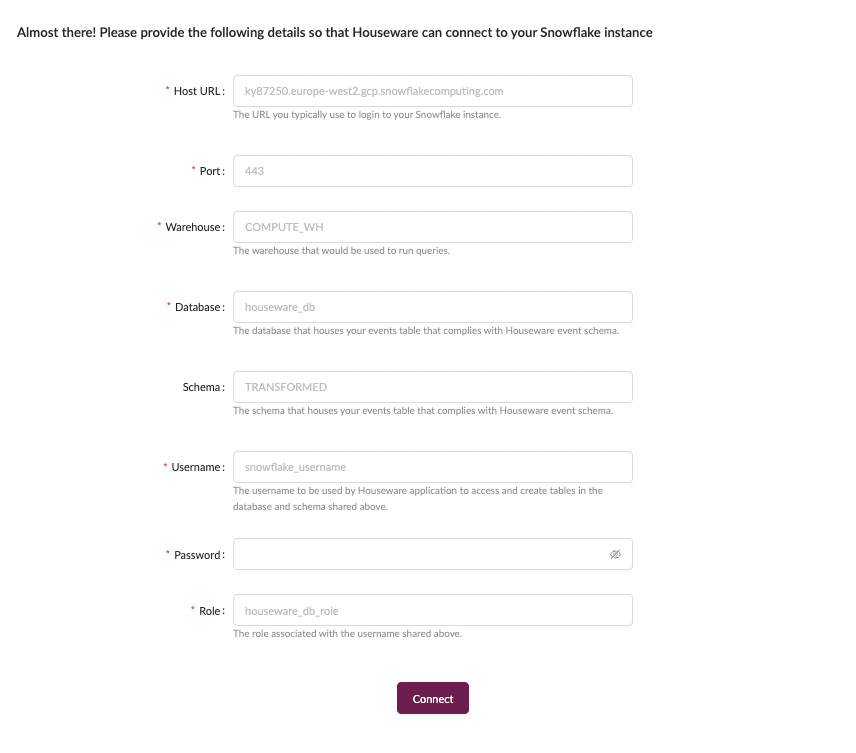
Form at the bottom of the Connecting Snowflake page
Here is a guide to help you fill out the form:
- Host URL: The host URL is typically used to log in to your Snowflake Instance. Skip the
https. Steps to extract it are given below. - Port: Input as 443. It is the default port for the Snowflake database. You can change it if required.
- Warehouse, Database, Username, Password, and Role: All these have to be filled in accordance with the details used by you while running the code snippets, shared in Step 2.
- Region: It is the region in which your Snowflake account exists - you can pick between the US, EU, APAC, UK, CANADA, and SINGAPORE.
- Schema: It is the location where transformed tables and metrics would be created. If you’re unsure, we recommend typing in
TRANSFORMED.
If you are facing issues extracting your Snowflake Host URL, here is how you can do it:
Step 1: Log in to your Snowflake account and go to the Admin page.
Step 2: Click on the Accounts tab and you will be redirected to the account page
Step 3: On the Accounts page, hover over your Account name, and your Snowflake account URL will show up, looking like - https://abc.snowflakecomputing.com as shown in the orange highlighted part of the image below.
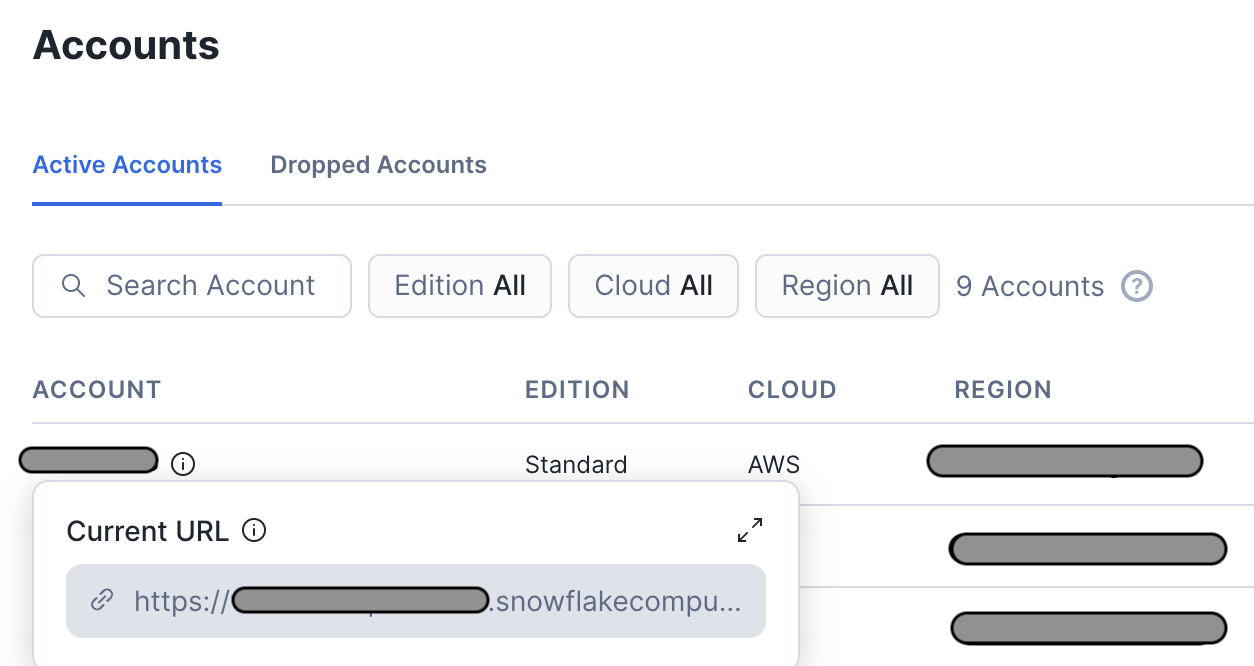
How to access your Snowflake account URL
Once your form is complete, click on the Connect button to complete the connection. And 🎉 your Snowflake is now connected to your Houseware application!
Before events start flowing to your Houseware instance, the application will have to auto-run jobs to compute the metadata, as mentioned in the part 1 guide. These metadata tables are important to power your visualization creation process on Houseware.
Note Time taken to generate the metadata tables is contingent on your event volume. It usually ranges between a few minutes to couple of hours at max.
As soon as the first run completes and the initial requisite set of metadata tables is generated, your Houseware application will be live with all your event data! ⚡
Updated 4 months ago