Quick start onboarding: Houseware on your Snowflake
Go ZERO to 100 with this quick start guide to help you set up your Houseware instance with events data from Snowflake.
Overview
This guide is a step-by-step Houseware onboarding for admins. At the end of this quick start, you can connect product events telemetry from a CDP (such as Segment) present on your Snowflake. This will help set you up for success as you get started with product analytics on Houseware and sharing with your product team.
Here's what you'll need before you get started!
- Snowflake admin access with
ACCOUNTADMINrole. - Access to events data (respective tables) on Snowflake from a CDP.
- Admin access on Houseware.
If you do not have access to Snowflake or the events data from the CDP, please forward this guide to your team.
This quick start onboarding comes in two parts.
🛠️ Part I: Data prep
Getting events from the CDP ready for Houseware on Snowflake
You’ll first transform the raw events data on Snowflake into the required schema for Houseware to understand.
🎊 Part II: Going live
Connecting Houseware & Snowflake to get Product Analytics ready!
You'll be ready to churn product insights quickly once you are through here. Let's go!
🛠️ Part I: Data prep
The steps below will help you prepare raw event data in the schema Houseware expects for product analytics.
Step 1: Curate the events
To start quickly, focus on the events most relevant to your team’s goals and use cases. We suggest curating the most fundamental events that help your team check out the first set of user funnels and trends. You can continually expand the set of events later as your needs grow.
Tip: Most admins find working with product and analytics teams to curate the events helpful.
Step 2: Create a new Snowflake database, schema and warehouse
A new database & schema will store your prepped events data into the required schema for Houseware to understand.
Copy and paste the below code snippet into Snowflake's SQL editor and hit run! Please ensure that you have the required role access as theACCOUNTADMIN.
-- creating variables for database, schema, warehouse
set db_name='HOUSEWARE_ANALYTICS_DB';
set schema_name='PRODUCT_ANALYTICS';

create database if not exists identifier($db_name);
use database identifier($db_name);
create schema if not exists identifier($schema_name);
use schema identifier($schema_name);

set warehouse_name='houseware_analytics_wh';
create warehouse if not exists identifier($warehouse_name)
WAREHOUSE_TYPE = 'STANDARD' WAREHOUSE_SIZE = 'MEDIUM' AUTO_SUSPEND = 60 INITIALLY_SUSPENDED = TRUE;M
Why should you create a fresh database?
- It is easiest to share a fresh database alongwith the necessary read-write access with Houseware application.
- It separates any concerns with other databases, sources on Snowflake and provides ease of troubleshooting access.
Why should you create a new warehouse?
- Avoids queuing with your existing workloads: Ensures that Houseware queries do not impact or are impacted by any of your existing workload queries on Snowflake.
- Ease of cost monitoring: A new warehouse will make it easier for your team to track Snowflake credit consumption driven via Houseware's query compute.
- Scale up or down as you go: At scale, Houseware workloads could use specific warehouse tuning recommendations that will help to drive efficient Snowflake credit utilization as you scale.
Step 3: Prepare the required schema for Houseware
Next, let us get into the final step. You will now prepare the schema Houseware expects for Product Analytics. This schema standardizes your events, users, and their properties, allowing for a seamless experience to get started.
Sample data prep script
The sample script below preps the raw events stream from Segment and creates theALLEVENTStable for Houseware to utilize. Ensure that you update and rename the following before you run the script:
RAW_EVENTS_TABLE_NAME: Replace with the table name where the raw events reside.SOURCE_SCHEMA_NAME: Replace this with the schema where theRAW_EVENTS_TABLE_NAMEresides.SOURCE_DATABASE_NAME: Replace this with the database where theSOURCE_SCHEMA_NAMEresides.
CREATE TABLE ALLEVENTS AS
(
  SELECT
    ID as event_id,
    ANONYMOUS_ID as device_id,
    USER_ID as user_id,
    SENT_AT as device_ts,
    TIMESTAMP as server_ts,
    EVENT_TEXT as event_name,
    {} as properties, --can be set to empty dictionary for simplicity in getting started
    CONTEXT_PAGE_PATH, --can be changed to any other column available in the events table
    CONTEXT_PAGE_TITLE, --can be changed to any other column available in the events table
    CONTEXT_PAGE_URL, --can be changed to any other column available in the events table
    CONTEXT_PAGE_REFERRER, --can be changed to any other column available in the events table
  from SOURCE_DATABASE_NAME.SOURCE_SCHEMA_NAME.RAW_EVENTS_TABLE_NAME
);
Important to note
Before proceeding, please ensure the following:
- Table name: The table should be named as
alleventsonly.- Mandatory columns: All columns marked with an
*are mandatory.- Column names:The column names should be exactly the same as given in the schema above. However, event dimension columns like
event_dimension1and user dimension columns likeuser_dimension_1can be named as per your choice.- Properties: The properties column in the schema should be a JSON with Object data type. The data type for the
keywill be a string, andvaluecan be a boolean, integer, float, date, or string. Nested JSON object/array are not supported.- Time: The time columns
device_tsandserver_tsin the above schema should be in UTC in the following format:YYYY-MM-DD HH24:MI:SS, for example2023-08-06 15:04:06.
Check out how the ALL EVENTStable will look like once you are done with the data prep here.
⭐ [Optional] Clustering and partitioning: For better query performance, add a cluster key using the server_ts and event_name columns. This improves the efficiency of queries that run on top of your event data. To know more about clustering and micro-partitions in Snowflake, read more here 👉 What is clustering?.
ALTER TABLE ALLEVENTS CLUSTER BY (DATE(SERVER_TS), EVENT_NAME);
⭐ [Optional] Keeping the Events table up-to-date with the latest data
To ensure the events table in Houseware always reflects the most current data, it’s recommended to set up scheduled data transformation scripts (hourly, daily, etc.). These scripts will automatically update your events data, keeping everything in sync without manual intervention.
Building on the sample SQL script provided above, you can utilize the repository to standardize and transform raw events into the Houseware schema on a regular basis. These transformations run incrementally, meaning they only process new events, which significantly reduces both computation time and costs. This allows for more frequent updates and ensures your data is always fresh and ready for analysis.
🎊 Part II: Going live!
In this section, you will connect Houseware & Snowflake to get Product Analytics ready!
Step 1: Create a new Snowflake user for the Houseware app
For Houseware app to connect to Snowflake, you will need to create a new Snowflake user and grant it the required access to:
- Access Snowflake to read/write tables to the DB.
- Use the warehouse created in Part I.
Use the Snowflake ACCOUNTADMIN role to run the code snippet below that will create a new user and grant it the required permissions. Ensure that you update and rename the following before you run the script:
db_namedb_rolesnowflake_usersnowflake_user_password
--Create a new DB role--
set db_name='houseware_analytics_db';
set db_role= 'houseware_analytics_role';

create role if not exists identifier($db_role);


--Granting Warehouse usage access to DB role--
grant usage on warehouse identifier($warehouse_name) to role identifier($db_role);
grant operate on warehouse identifier($warehouse_name) to role identifier($db_role);
grant usage on database identifier($db_name) to role identifier($db_role);
grant create schema on database identifier($db_name) to role identifier($db_role);
grant usage on all schemas in database identifier($db_name) to role identifier($db_role);
grant usage on future schemas in database identifier($db_name) to role identifier($db_role);
grant create table on all schemas in database identifier($db_name) to role identifier($db_role);
grant create table on future schemas in database identifier($db_name) to role identifier($db_role);
grant select on all tables in database identifier($db_name) to role identifier($db_role);
grant select on future tables in database identifier($db_name) to role identifier($db_role);
grant select on all views in database identifier($db_name) to role identifier($db_role);
grant select on future views in database identifier($db_name) to role identifier($db_role);

set snowflake_user= 'houseware_analytics_user';
set snowflake_user_password='Abcdef12345';

--Creating Snowflake user with Default role and warehouse--
create user if not exists identifier($snowflake_user);
set default_role = UPPER($db_role);
set default_warehouse = UPPER($warehouse_name);
alter user identifier($snowflake_user) set password=$snowflake_user_password default_role=$default_role default_warehouse=$default_warehouse;

--Granting DB role to Snowflake user--
grant role identifier($db_role) to user identifier($snowflake_user);
Step 2: Choose Snowflake as your preferred cloud data warehouse on Houseware
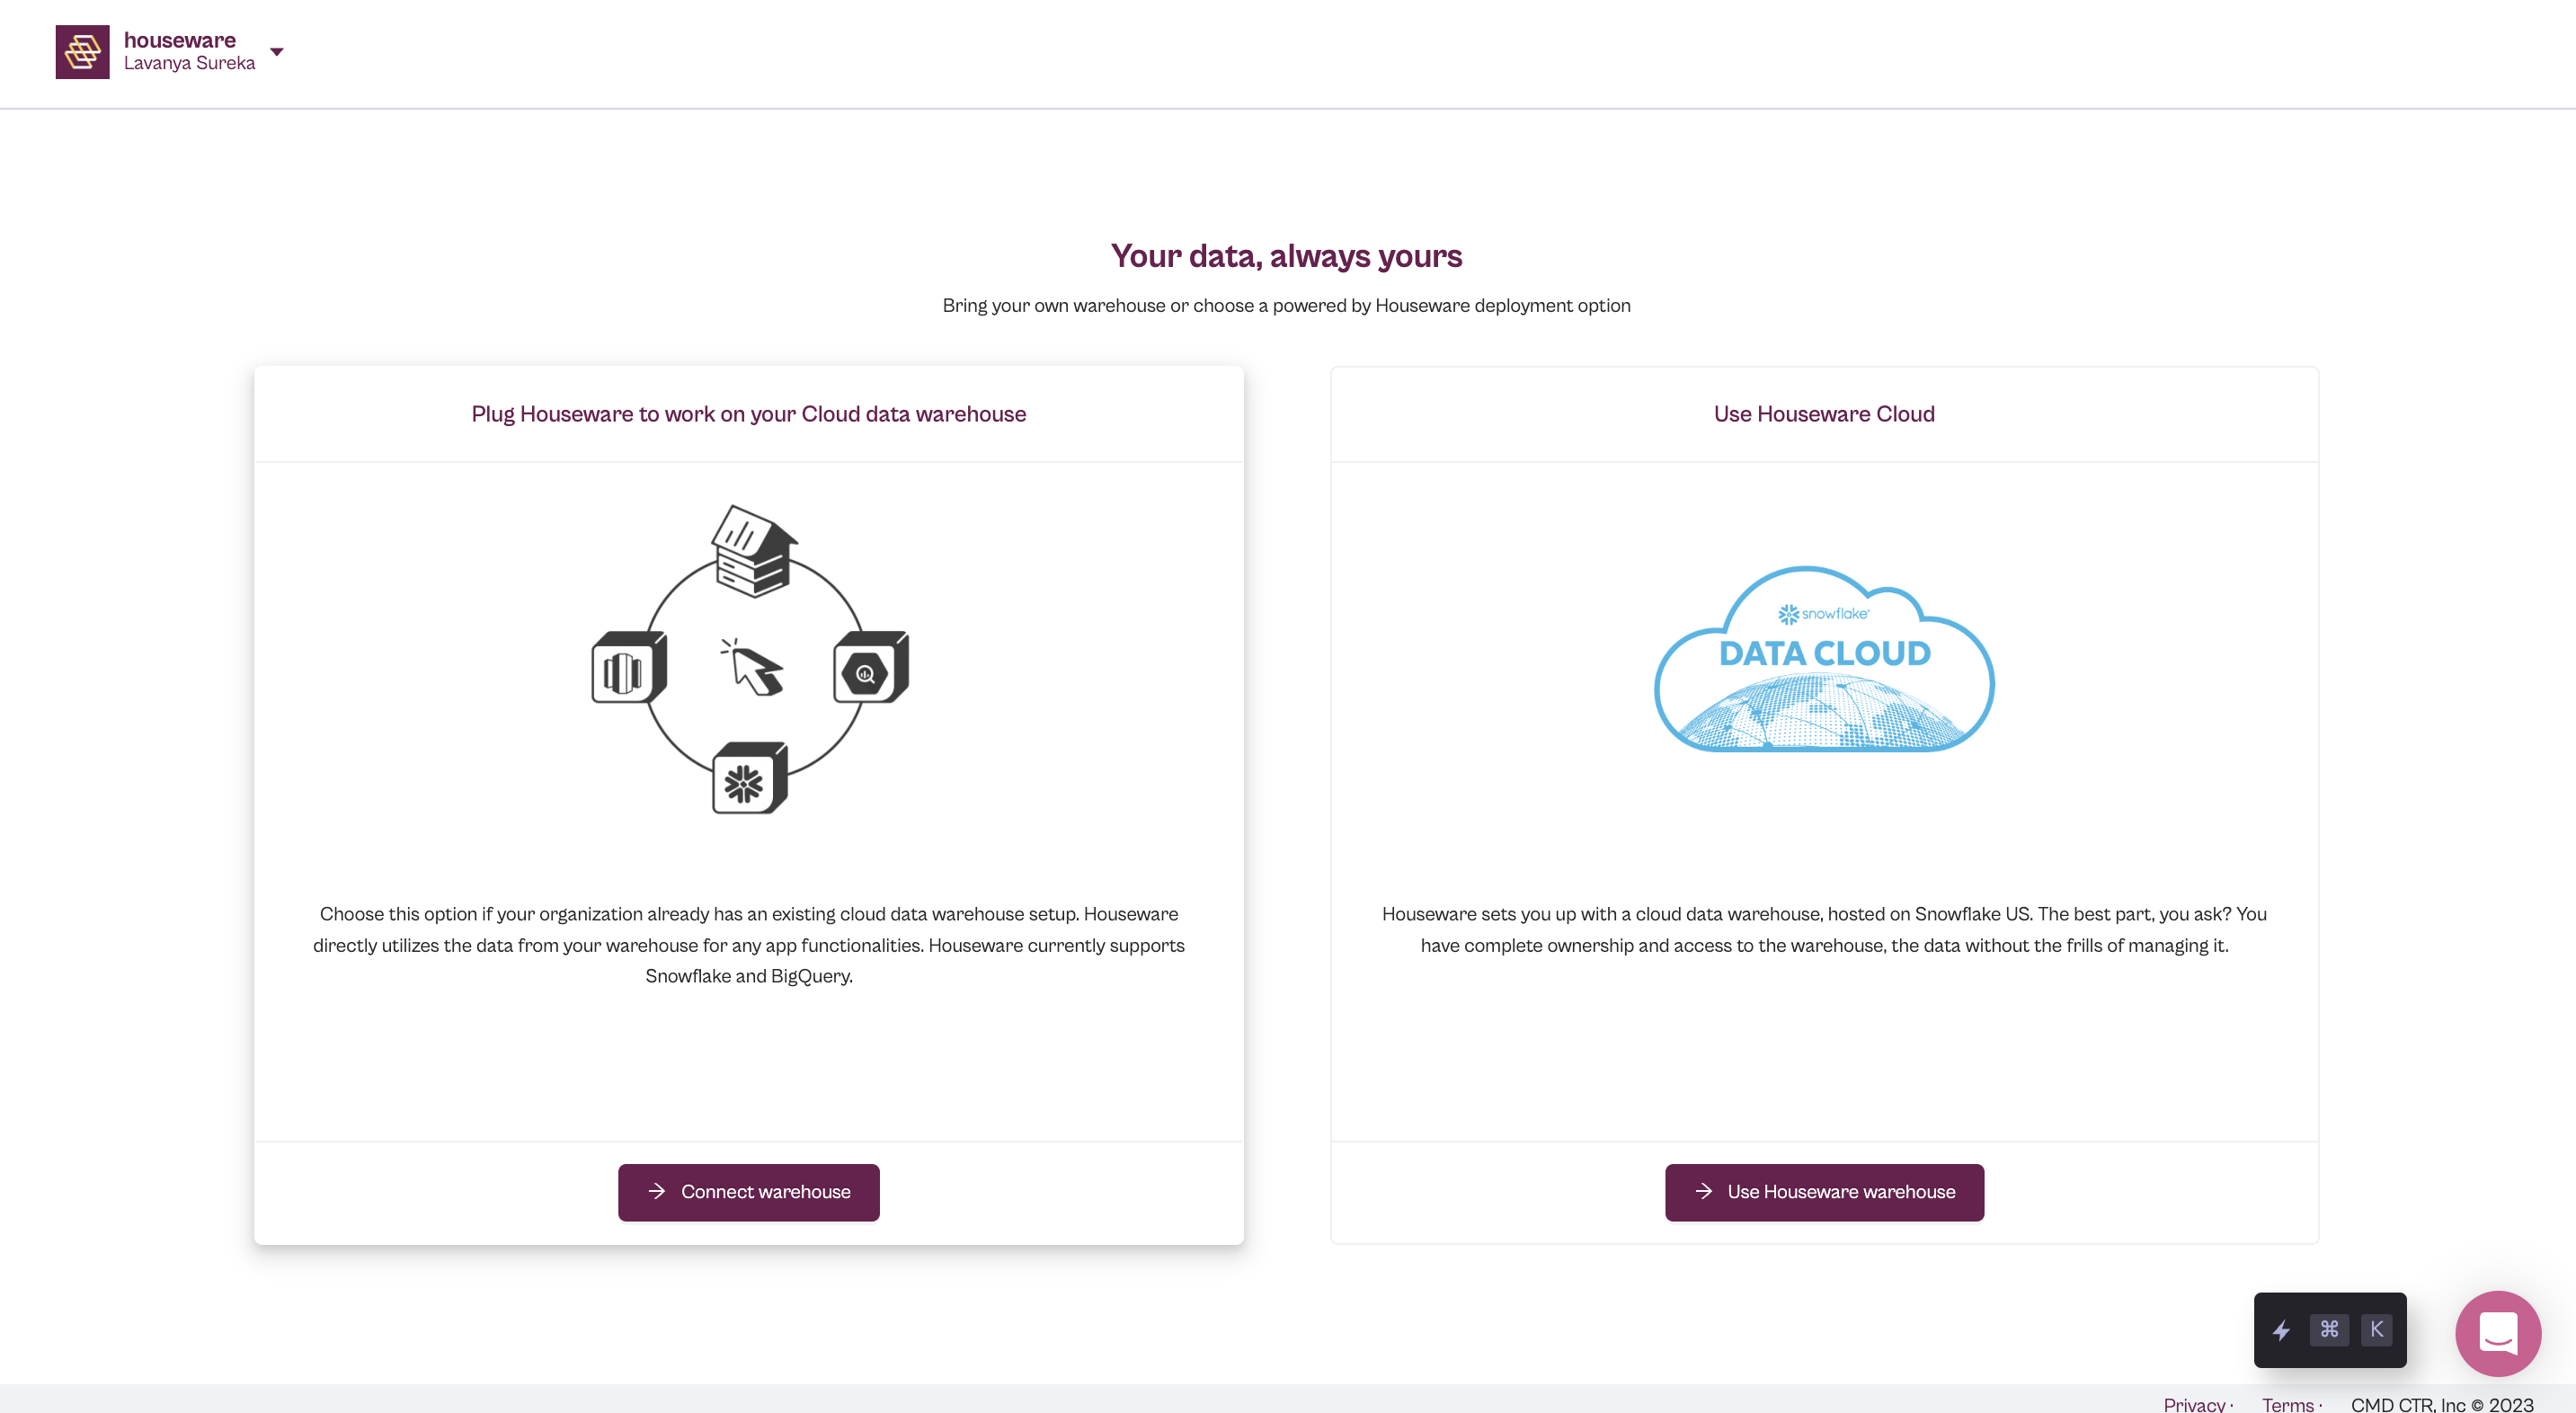
When you first log into Houseware, you will be prompted to chose one of two options. Choose the "Connect Warehouse" option here.

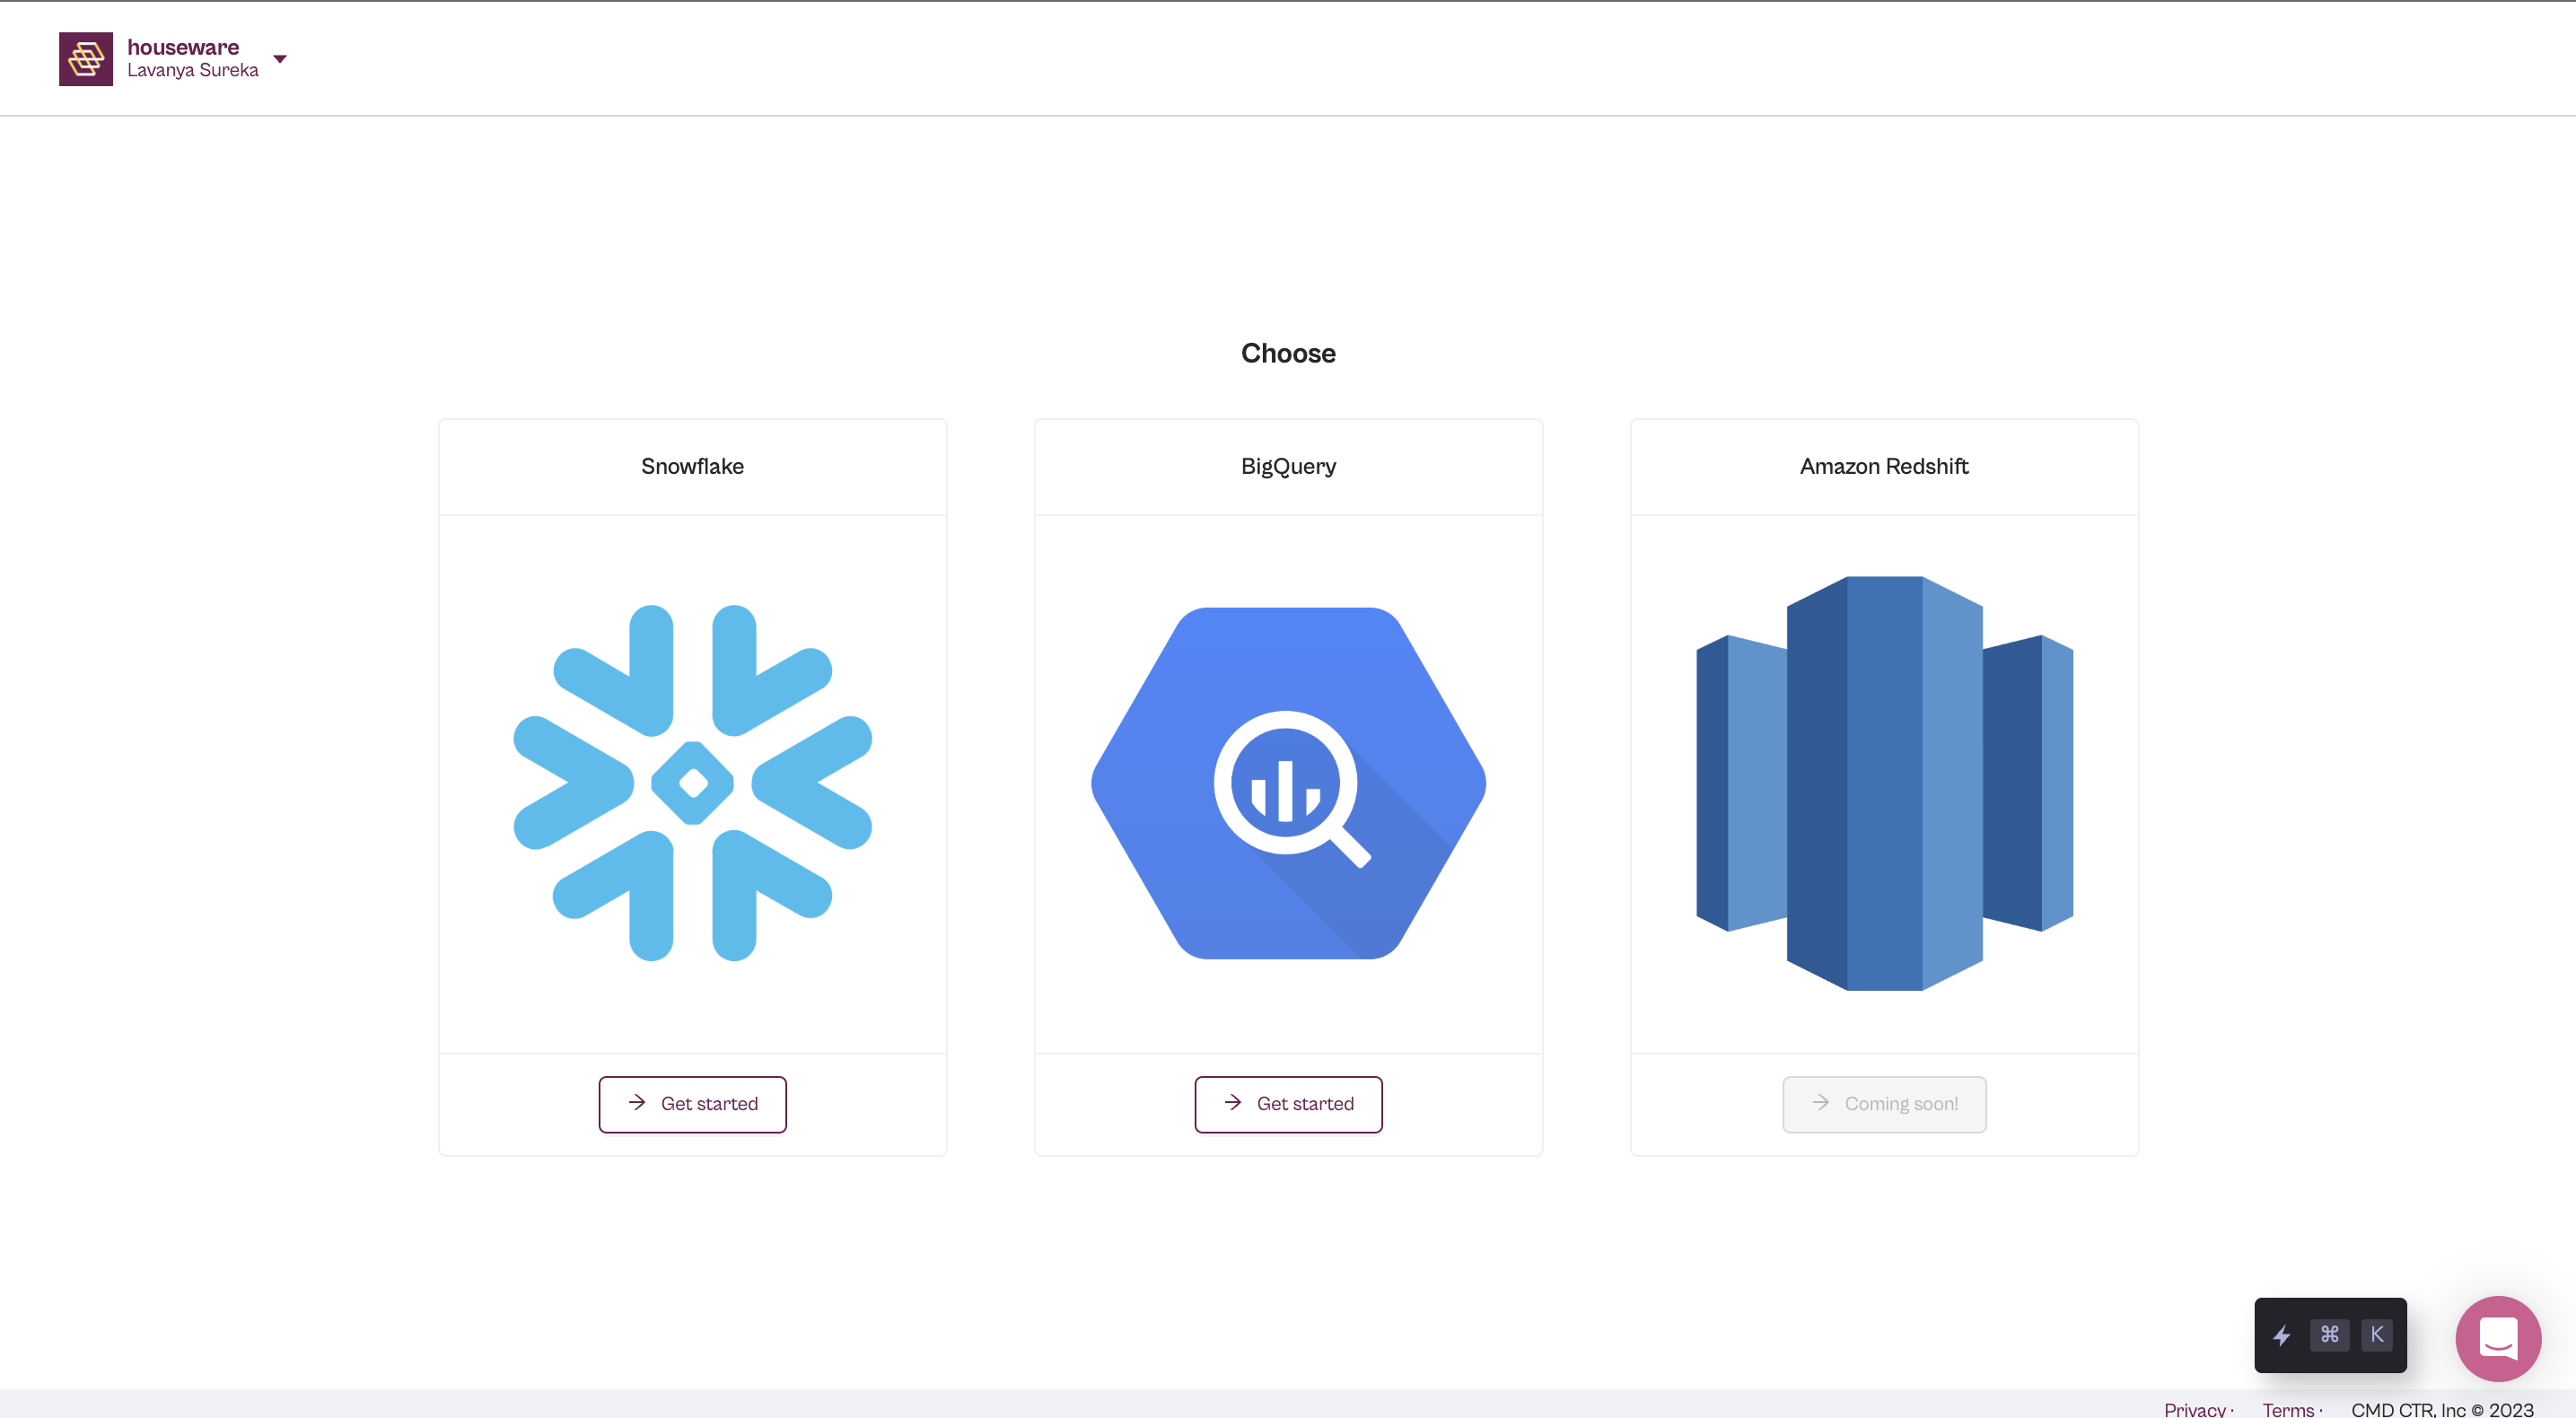
Next, choose Snowflake as the data warehouse you want to connect to on the page shown below.

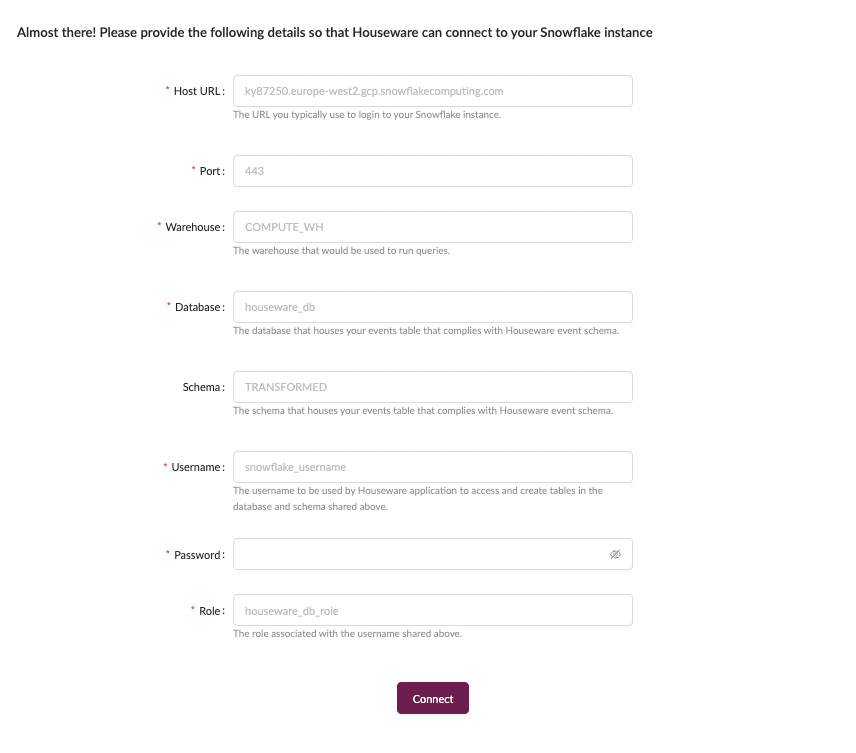
Step 3: Share Snowflake details on Houseware to connect successfully
Fill up the form using the details you used in the code snippets in Part I and general Snowflake account information.

Here is a short guide to help you share Snowflake details:
-
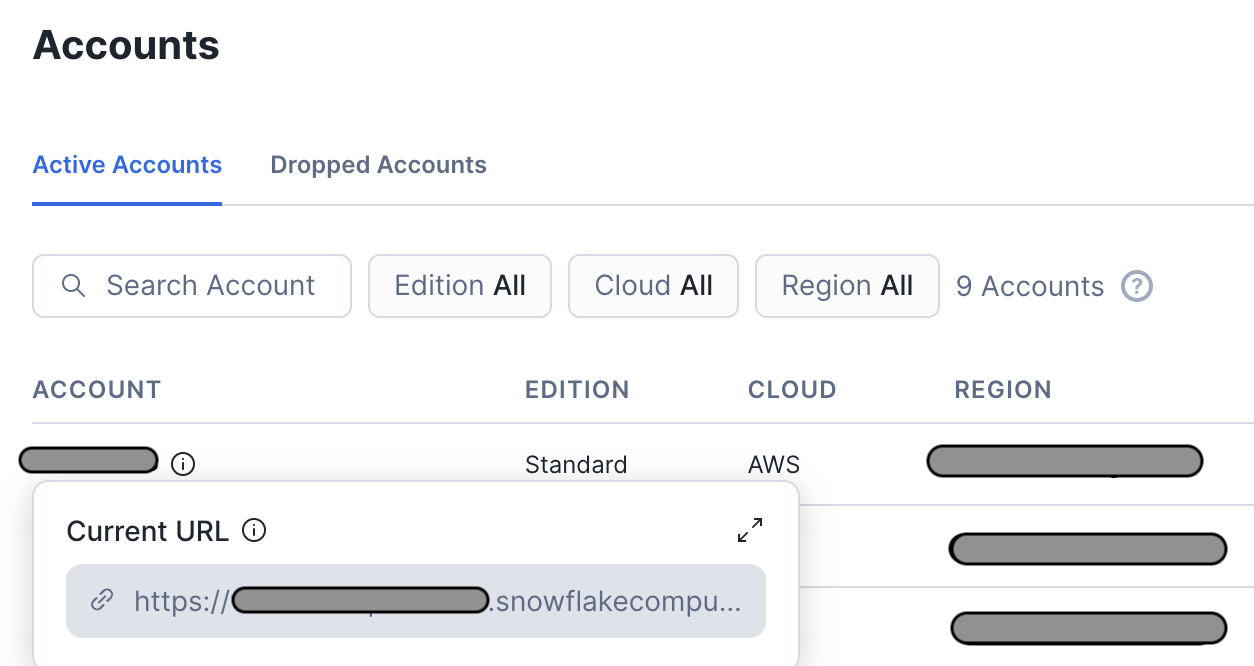
Host URL: The host URL is typically used to log in to your Snowflake Instance. Skip the
httpsfrom the URL you use or follow these steps:- Log in to your Snowflake account and go to the Admin page.
- Click on the Accounts tab and you will be redirected to the account page.
- On the Accounts page, hover over your Account name, and your Snowflake account URL will show up. It'll like:
https://abc.snowflakecomputing.comas shown in the image below.

-
Port: Input as 443. It is the default port used for the Snowflake database. You can change it if required.
-
Database, Schema, Warehouse, Username, Password, and Role: All these have to be filled in accordance with the details used by you while running the code snippets in Part 1.
That's all! Go ahead and hit the Connect button to complete the connection. Your Snowflake is now connected to the Houseware application!
🎊 Congratulations!
Your setup is now complete and you should be good to start churning out product insights using Houseware.
Updated 4 months ago
